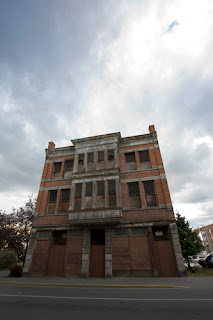
 Step 2: Process the image.
Using RAW conversion software, I boosted the contrast and brightened the image to properly expose the darker foreground area.
 Step 3. Process the image again.
This time I darkened the image to accent the dark clouds in the background.
There are a variety of way to merge these two images in Photoshop, and doing any of them will require at least a basic working knowledge of Photoshop. Here's the simplest way to do it.
Open both versions of the image. In the layer pallet, grab one of the images, and drag it onto the other image. Make sure the layers are properly alligned, then simply delete the area of the top layer that you do not want in the final image. If the darker photo is on top, then delete the areas of the photo that you want to be lighter. This will reveal the brightened version underneath. Tada! You can also use a layer mask to hide the unwanted areas of each layer, but that would take more time to explain... time that I would prefer to spend sleeping.
Goodnight,
Gerald


1 comment:
Love the HDR. Printing and hanging on my tutorial wall!
Post a Comment